1.31.2007
Exhaust will probably be the tanabe grand touring (medallion)
I've looked at some headers, for some reason I think I like the comptech one better than the DC sports one. It's stainless steel...
Tanabe also offers some (shocks) that lower the 2006 civic si just a tiny bit. they fit the stock set up or can go along with various other tanabe pieces.
soo...
right now we're looking at-
Tanabe Exhaust (575.00)
Tanabe Springs (290.00)
Comptech header (500.00)
K&N SRI (200.00)
Yokohama AVS ES 100 tires (500.00, with installation fees)
1.25.2007
exhaust- decided- tanabe medallion touring; closest to factory but both cat-back and mandrel bent. high quality. expensive. sound clip here. this is very close to the stock sound of the car and does not sound ricey.
1.09.2007
tires- decided- yokohama AVS ES100

Falken RT615
Yokohama Spec 2
Yokohama Spec 2
1.07.2007
Coming soon to stores near you
I think, for the next thing, I'm either going to upgrade to the EBC Brake pads and slotted rotors, or I'm going to install a DC Sports Header. However, I don't want to void my warranty, and I don't know whether the header HAS to replace a catalytic converter (probably), so most likely it'll be the brakes. It'll be a while, though- probably after march. Back to hibernation, I guess.
1.05.2007
Installing the Short Ram air intake
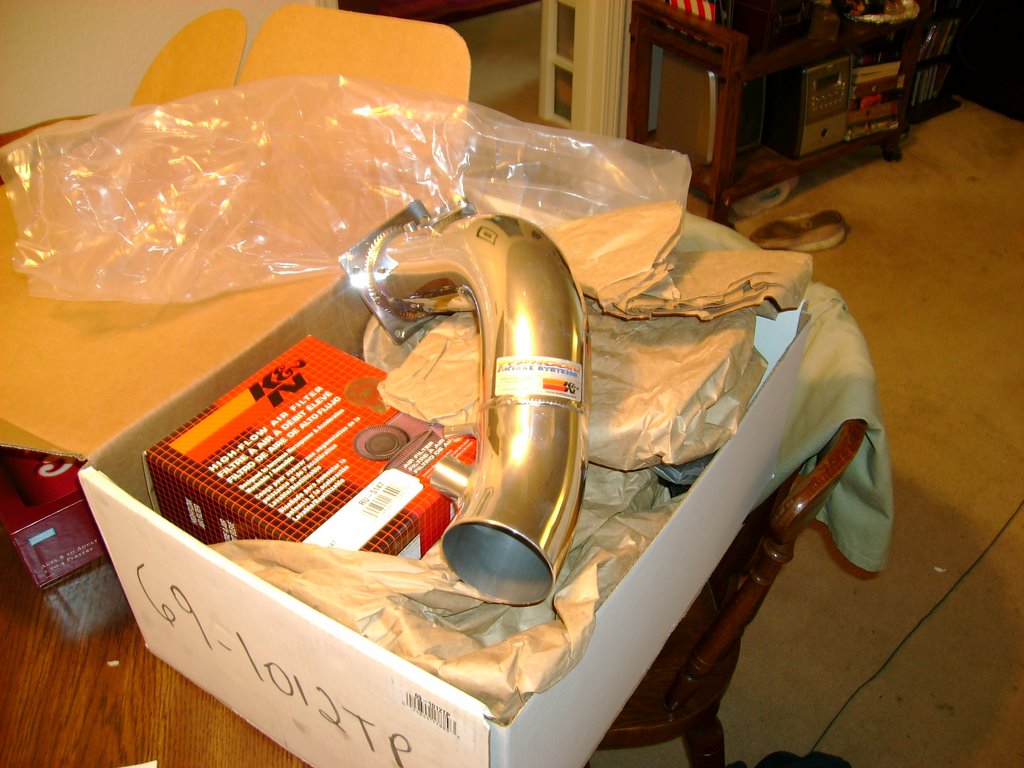 It got here already! DANG that was some fast shipping. I'm pretty excited but I'll try to tone it down for all of you readers (right...).
Randy, a good friend of mine, helped me with the install. I had to borrow all of his tools and I don't have a garage of my own, so I had to go over to his place anyway. Might as well borrow his expertise.

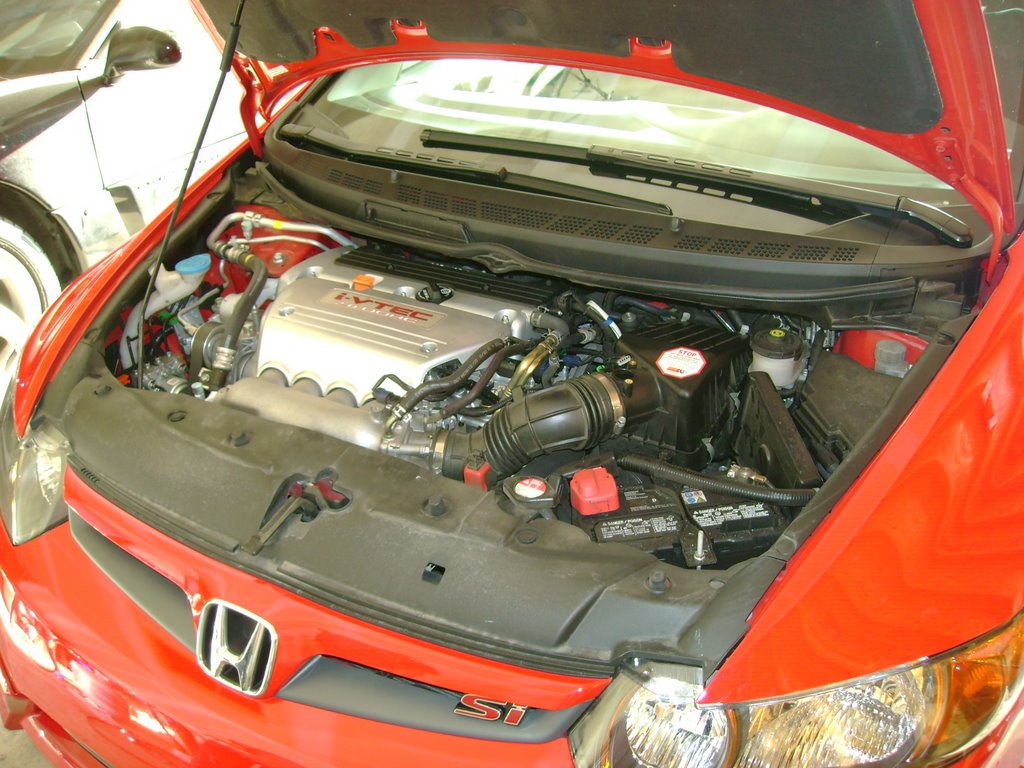
Here's a shot of the engine before we start. we're going to remove the factory airbox entirely.

Let's start by removing the MAF sensor. I disconnected the wiring harness (I tucked it around a cooling tube for now) used a phillips head screw driver to remove the screws holding the MAF in place, and used some pliers to cut the green snap holding it down. You can see that it's been totally removed in this picture already.
I went ahead and installed the MAF sensor to the K&N Intake. I used the factory screws, you can use the K&N Alan screws if you'd like instead.
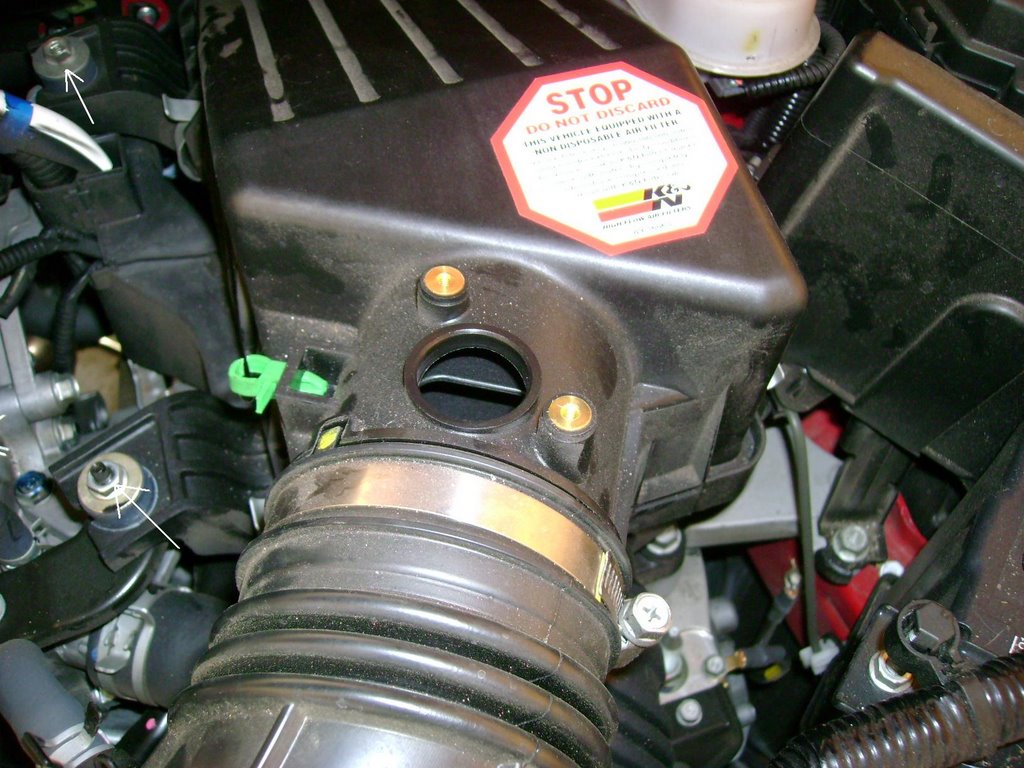
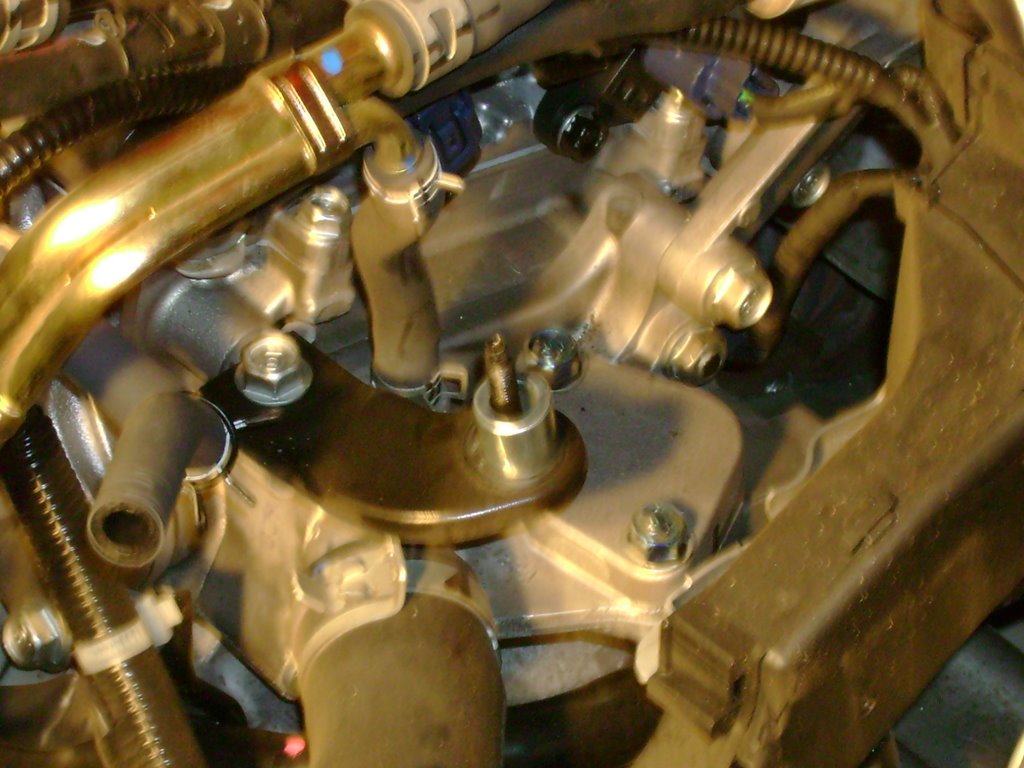
Same picture again. This time around you need to loosen and remove The nut and screw the white arrows point to. I think it's an 11 mm, but I'm not sure. Make sure to retain these, as the short ram system will use them to bolt to the engine.
While you're at it you might as well pull the tabs holding the top of the airbox to the bottom, as if you were going to change the filter.
I kinda didn't take some pictures in the in-between, but that's okay. If you happen to be doing this on your own, You've got the K&N instructions anyway.
 The two white arrows are pointing to some lines you're going to have to pull out of the intake. I obviously already have... For the one on the right, grab the clamps holding to the intake with some pliers, and move them down the line. If you look closely, you can just barely see the clamp on down the hose. The left arrow- that golden hose thing will simply pull out of the intake.
The black arrow points to where the plastic hosing would be attached to the actual... Intake manifold... grab a phillips head screw driver and loosen the hose clamp. At this point the whole top half of the air box should come out (with some mad wiggling, that is).
Finally, the Hot Pink (yes, that gets to be capitalized) arrow points to the last screw holding the bottom of the airbox to the car. it's hiding under the clip, you can't see it. You'll need a long extender to get to this one. Now that the bottom is loose, it should come out, too. You'll have to pull on it like crazy, but it will come loose from the bottom intake (or snorkel) with a little work.
 Now that that is all done, we're ready to put the SRI itself together. Randy and I ran into a couple problems- One of them is that the rubber hose that you shove into part of the new air intake didn't fit at all. it was too small. Fortunately, Randy has this old, disused Camaro over in the corner of his garage. We pulled a hose off of that- one that miraculously fit- and cut it to the right size.
(The car you can barely see is a 1992 Dodge Stealth R/T Twin Turbo. It's Randy's, and it's fast.)

Here's a picture of the hose. even has the measurements on it if you run into the same problem.

Put the adaptor on. make sure to put both hose clamps on it (I didn't in this picture. just seeing how well IT fit).
Put the spacer in place. It's the silvery thing sitting on the screw in the center of the picture.
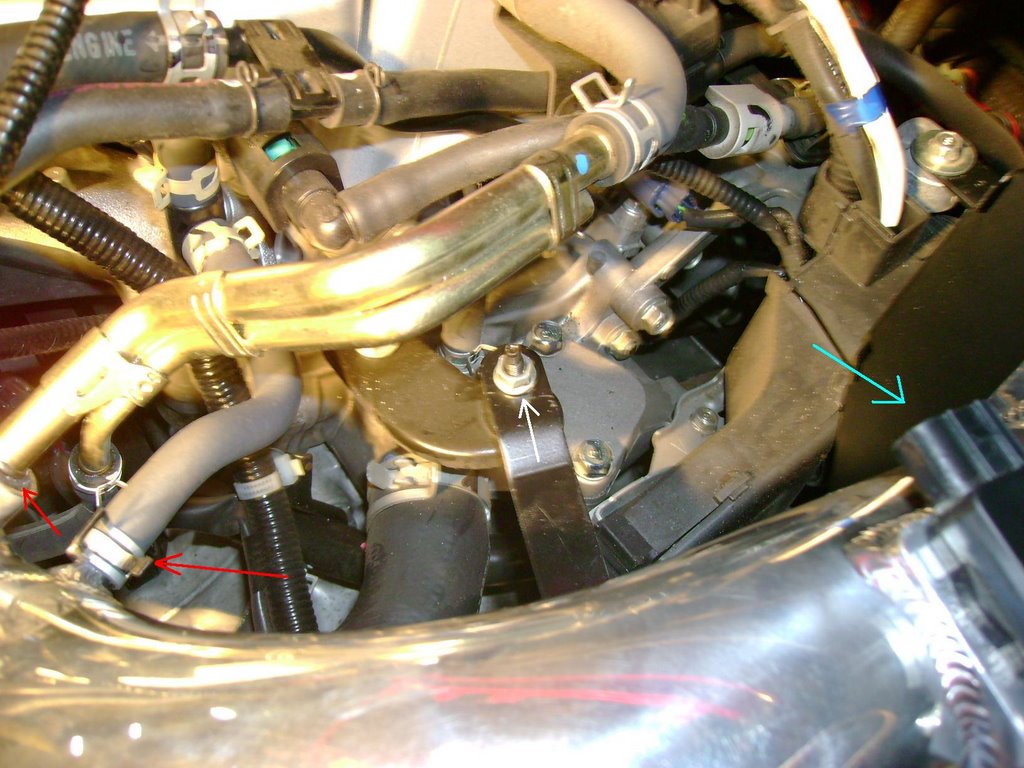
Finally, get the assembled Intake into the bay! plug your air lines back up- Red arrows to those (make sure to move that clamp back up the line so it rests over the metal).
Tighten everything down- the white arrow is to one of the screws (make sure not to tighten the ones into the intake too much, it is aluminum, after all). and plug your MAF sensor back in. Make sure everything is secure.

and you're done! It looks pretty good, and now your car sounds like an F-15 Eagle. Certified.
1.02.2007

I ordered the short ram intake today. I went with K&N for several reasons- reliability, longetivity, their million-mile warranty... plus, the installation looks easy and I've never heard a bad thing about them.
Also, once you think about it the f5 seems really gimmicky- for the same price as the K&N the f5 comes with a duffel bag, some crap, and a can of NOS energy drink. why do they want to send me all that stuff? I don't care.
So, I went with the K&N. t's all aluminum, no rubber (which I like better) and it comes with the heat shield, which WILL protect the filter from radiated heat.
![]()


